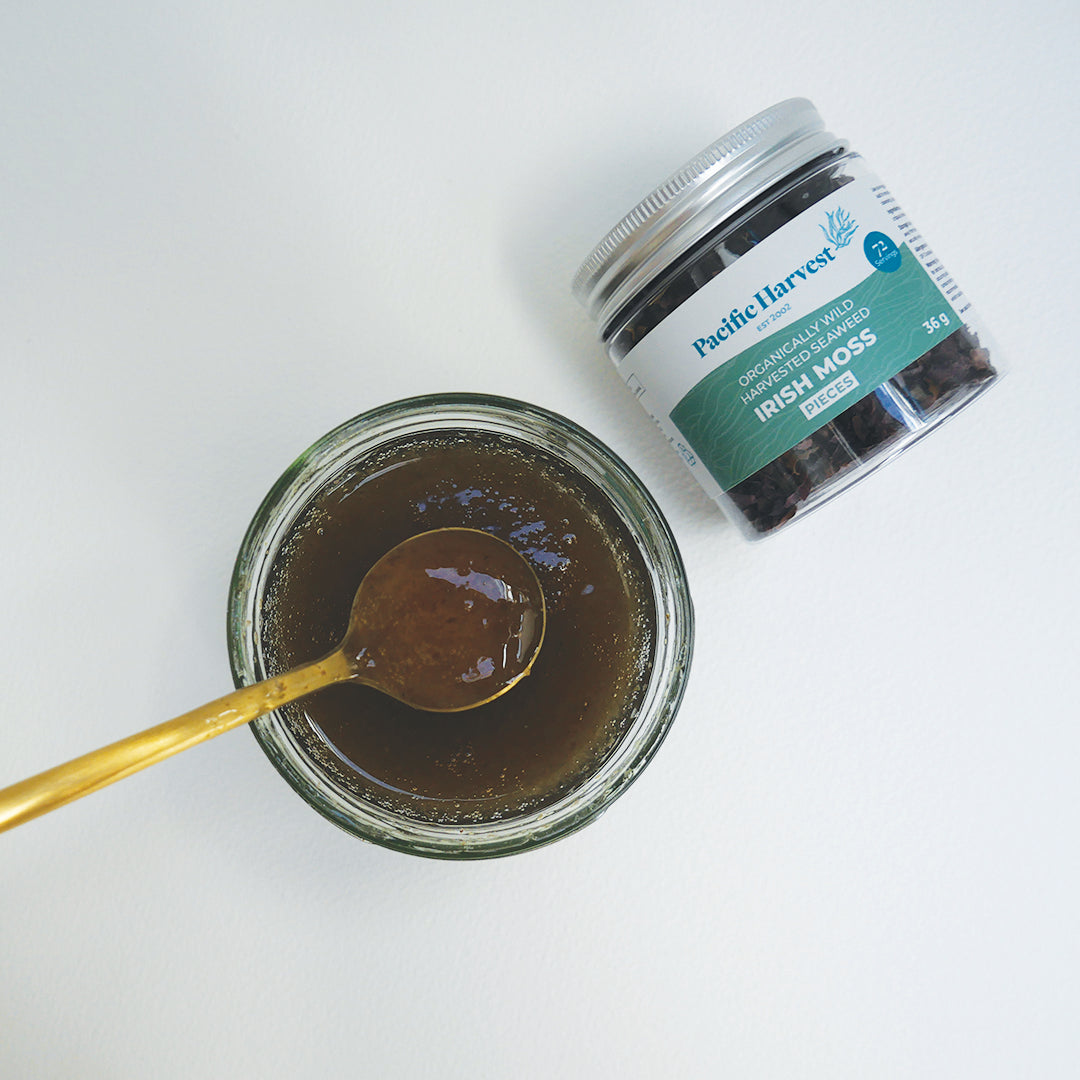
Set aside a little time to make Irish Moss (or Sea Moss as it is sometimes called) gel at home using either of our 2 tested methods.
When you make your own gel, there is no wastage - just make up what you need and you can freeze or store any excess you have made. If you purchase made up gels they can have a limited shelf life.
Follow these instructions step-by-step, and you will be delighted with the results!
- Simmer using a low heat (never boil your sea moss) or
- Soak it overnight if you prefer a raw sea moss gel. Take care to get the ratio of water to seaweed exact - if you put too much water in the gelling process can be delayed*
Irish Moss can be used in vegan and vegetarian cooking. Add it to your morning smoothie to boost nutrients and build immunity, human health, and planet health, or use it in DIY beauty treatments. Read about all the ways to use Irish Moss here.
We prefer to use Irish Moss, a species sourced from cooler waters which tend to be more nutrient dense. Read more about this here.
With either of these methods, before you start please know:
- Rinse the raw Irish Moss seaweed thoroughly under water. The aroma of the ocean that comes out of a packet of our beautiful wild harvested Irish Moss is a good indication this is an authentic product. However it may be off putting to some. As you rinse it, the ocean flavour will diminish and the colour will lighten.
- Ensure you have a clean, airtight container for storage of your made up gel.
- Once you have made the Irish Moss gel, place it in your clean container with a lid and then put it in the fridge. The gel will form after about 2 hours.
- The gel will last approximately 3 weeks in the fridge. You can also freeze it if you have made too much, and this should last for up to 3 months.
- A typical daily serving is around 1-2 tablespoons of the gel but experiment with what suits you best.
- You can blend berries or lemon juice with your made up gel before you put it into your container if you prefer a more flavoured gel.
- If you are time poor, the simmer method can be more effective as a little heat will activate the gelling process. Just don't let it boil.
Ingredients required for either method:
- 1 cup Irish moss raw seaweed
- up to 2 cups spring water/filtered water (no more than this!)
- Sieve (optional) (and spoon to scrape the seaweed through) or blender
- Clean airtight container
Making Irish Moss Gel Using the Simmer Method (use this if you are short on time)
- Add one cup (or less if you require a firmer set) of cleaned Irish Moss to no more than two cups of filtered/spring water.
- Simmer slowly until most of the seaweed has dissolved (around 30-40 minutes). Do not boil as this will impact nutrients.
- Blend with a blender until smooth, or if you prefer, remove any undissolved fragments by straining the solids through a sieve. Use a spoon to scrape the sieve if required.
- You can add lemon juice or blended fruit to your gel if you wish at this point. Blend together well if you choose to do this. Pour gel into a clean jar or mould to set.
Make Irish Moss Gel Using The Raw Overnight Soaking Method
This option takes a little longer but it’s worth it if you prefer raw. Furthermore, this preserves the nutrients within the gel better than using heat.
- Put a cup of cleaned Irish Moss into a bowl and cover it with enough filtered/spring water to submerge the seaweed (with a little extra over the top as the seaweed will expand and absorb the water. Cover it and leave for 12 – 24 hours. You don’t need to put it in the fridge.
- As it soaks the seaweed will expand and absorb the water. It becomes gooey/slippery to touch. If you prefer a firmer gel you can add a little heat under it to further activate the gelling process, just don't boil it.
- After soaking, use this mixture as is, or blend with a blender until smooth. Don’t throw any of the water the moss has been soaking in away, OR, if you prefer, remove any undissolved fragments by straining the solids through a sieve. Use a spoon to scrape the sieve if required.
- You can add lemon juice or blended fruit to your gel if you wish at this point. Blend together well if you choose to do this. Pour gel into a clean jar or mould to set.
Tip: Use any waste from either of these processes on your skin or add it to your house plants if you don’t want to use it in your gel.
Why do you suggest we make Irish Moss gel and not purchase it already made up?
There are many ways to purchase Irish Moss but we prefer going back to source – the raw seaweed. This way, you know what is in it! Yes, you will need to set aside a little time to make up the gel from this raw seaweed, but you can rest assured the goodness from the ocean has not been processed out of it. With additional processing and heat, seaweed's nutrient density can be damaged.
You can purchase made up gel for convenience rather than make your own. However by the time it's reached your shopping trolley it may have a limited shelf life. Some brands add preservatives and artificial flavours to their made up gels. We prefer to offer the raw ingredients so you can control the quantity you need, when you need it, and know the quality is optimal with no nasties added.
Why is the colour of Irish Moss red/brown colour and not blonde?
We use a species called Chondrus crispus which grows in the more nutrient rich north Atlantic ocean and is a darker colour of a similar species of seaweed which grows in the warmer waters around parts of Asia and the Caribbean. Additionally we air dry this species indoors to keep it food grade and reduce risk of contamination during the drying period. As a result it retains its darker colour and does not become sun bleached.
Learn about the many ways to use Irish Moss as a functional ingredient.
Check out these links to learn more about Irish Moss.
- Is Sea Moss the same as Irish Moss?
- Three ways to use Irish Moss seaweed.
- The remarkable health benefits of Irish Moss
Disclaimer: This material is provided for educational purposes only and is not intended as a substitute for professional medical advice, diagnosis, or treatment. This information may not include the very latest research. We encourage you to do your own research and discuss your findings with a qualified health practitioner who can help you validate the outcomes in the context of your specific & individual health situation.